
 By
By Chapter 2:
Build your user interface
Let’s build your UI using Anvil’s drag-and-drop editor.
Step 1: Rename your Form
Click on ‘App’ ![]() in the Sidebar Menu to open the App Browser. The App Browser lists the main parts of your app. You’ll see Client Code, Server Code and Assets. Client code is code that runs on the user’s browser and is responsible for the app’s User Interface.
in the Sidebar Menu to open the App Browser. The App Browser lists the main parts of your app. You’ll see Client Code, Server Code and Assets. Client code is code that runs on the user’s browser and is responsible for the app’s User Interface.
Forms are the pages that make up your Anvil app. When you create a new Anvil app, it will already have a Form added called Form1.
Click on ‘Form1’ to open the Design View of that Form. This is where we will drag and drop components to build the UI.
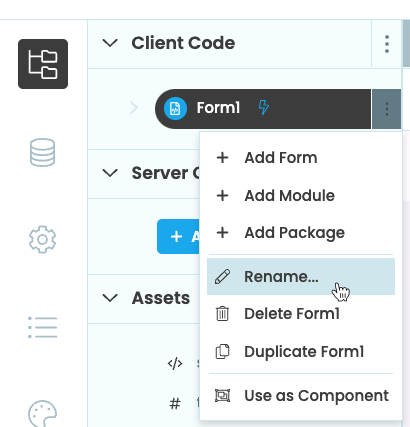
Rename ‘Form1’ to ‘Homepage’ by clicking the three dots menu  and choosing ‘Rename…’.
Step 2: Add a Button component
We’ll construct the UI by dragging-and-dropping components from the Toolbox into the Form.
Drop a Button ![]() onto the page. Our users will click this button when they want to add a new news article.
onto the page. Our users will click this button when they want to add a new news article.
Below the Toolbox, you’ll see the Properties Panel, where you can edit the styling and behaviour of your components.
Select the Button you just added to the page, and change its name from self.button_1 to add_article_button. We’re changing the name of our Button to make it easier to identify from code.
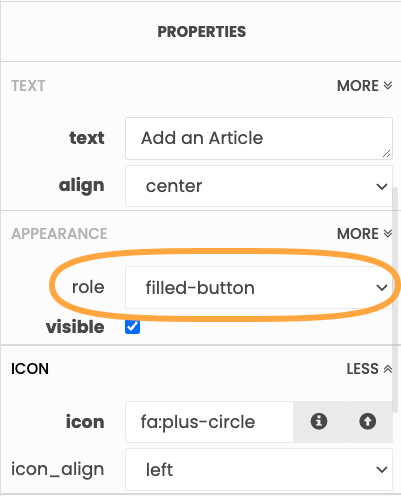
Next, change the text property to ‘Add an Article’. Scroll down to the ‘Icon’ section, and add an icon to the Button by clicking the ![]() . This allows you to search for an icon to use. Choose the
. This allows you to search for an icon to use. Choose the plus-circle for this example.

Finally, let’s change the look of the Button. Roles are an easy way to style components to fit the app’s theme. In the ‘role’ dropdown menu under ‘Appearance’, chose filled-button.
With those changes applied to its properties, the Button should look like this:

Step 3: Add a create/update Form
Next, we’ll build the UI for Creating and Updating news articles. We can save work by using the same UI and code for both! (We talk about this more in our CRUD best-practice guide.)
Add a new Form to the app by opening up the App Browser and clicking the three dots menu next to Client Code.
Then click ‘+ Add Form’ and choose the Blank Panel template. Rename the newly added form to be ‘ArticleEdit’ (in accordance with our recommended naming convention).
The ArticleEdit Form will ask our users for the ’name’, ‘content’, ‘category’ and ‘image’ for each article they want to add to the Data Table (we’ll populate the ‘created’ and ‘updated’ columns programmatically).
We’ll use Labels ![]() for our input prompts. Drop four Labels onto the page, and change their
for our input prompts. Drop four Labels onto the page, and change their text properties to:
- Title:
- Content:
- Category:
- Image:
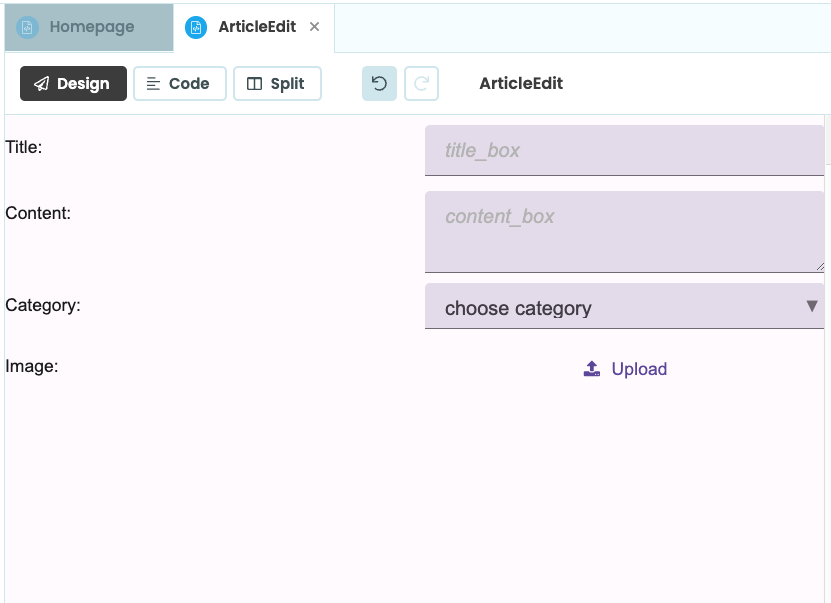
We’ll then need user input components for each of these Labels. Drop the following components onto the page, renaming them as you go. Giving the components a more descriptive name makes them easier to identify in code.
- Title: TextBox, rename this
title_box - Content: TextArea, rename this
content_box - Category: DropDown, rename this
category_box - Image: FileLoader, rename this
image_uploader
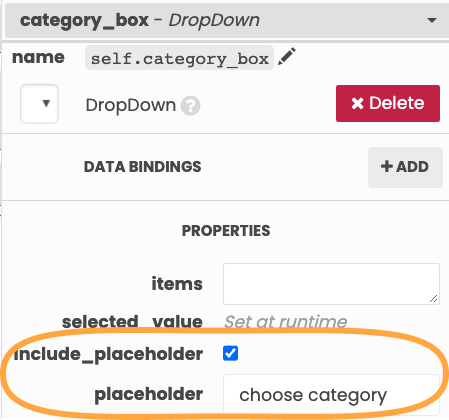
We’ll also add a placeholder to our DropDown. Select the DropDown you just added, check the ‘include_placeholder’ box, and set the placeholder to ‘choose category’.
Our ArcticleEdit UI is now complete.
We’ve constructed a UI to Create and Update articles. Nice work!
In Chapter 3, we’ll write a few lines of client-side Python to populate the ‘categories’ dropdown with the categories we stored in our database.