Chapter 2:
Create your Trello board
Let’s create a Trello board that we can use as our applicant tracking system’s UI.
Step 1: Create a Trello Board to track applicants
We’ll start by mapping out our hiring process in a Trello board.
To follow along with this section you will need to know the basics of how to create and use Trello boards, lists and cards. If you’re brand new to Trello, Trello’s getting started guide has both a ‘Trello 101’ and a ‘Create A Board’ section which will teach you everything you need to know for this step of the tutorial.
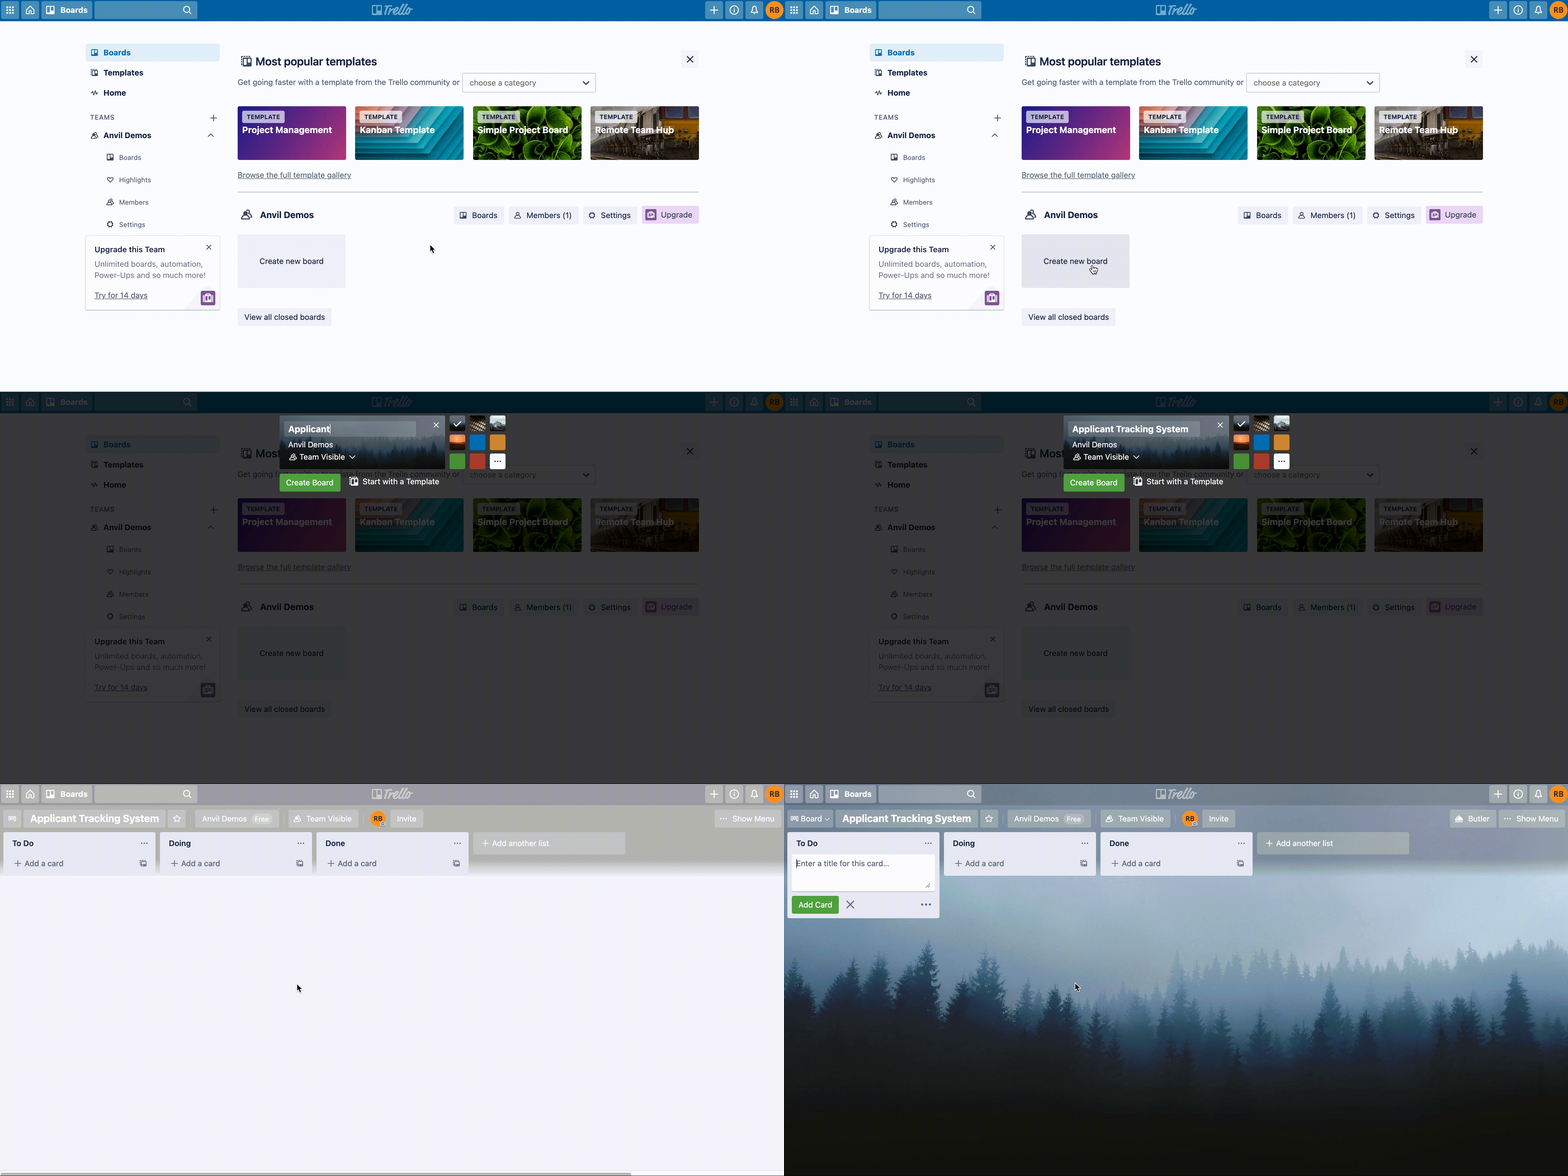
Start by creating a board called Applicant Tracking System in Trello.

Creating our Trello board
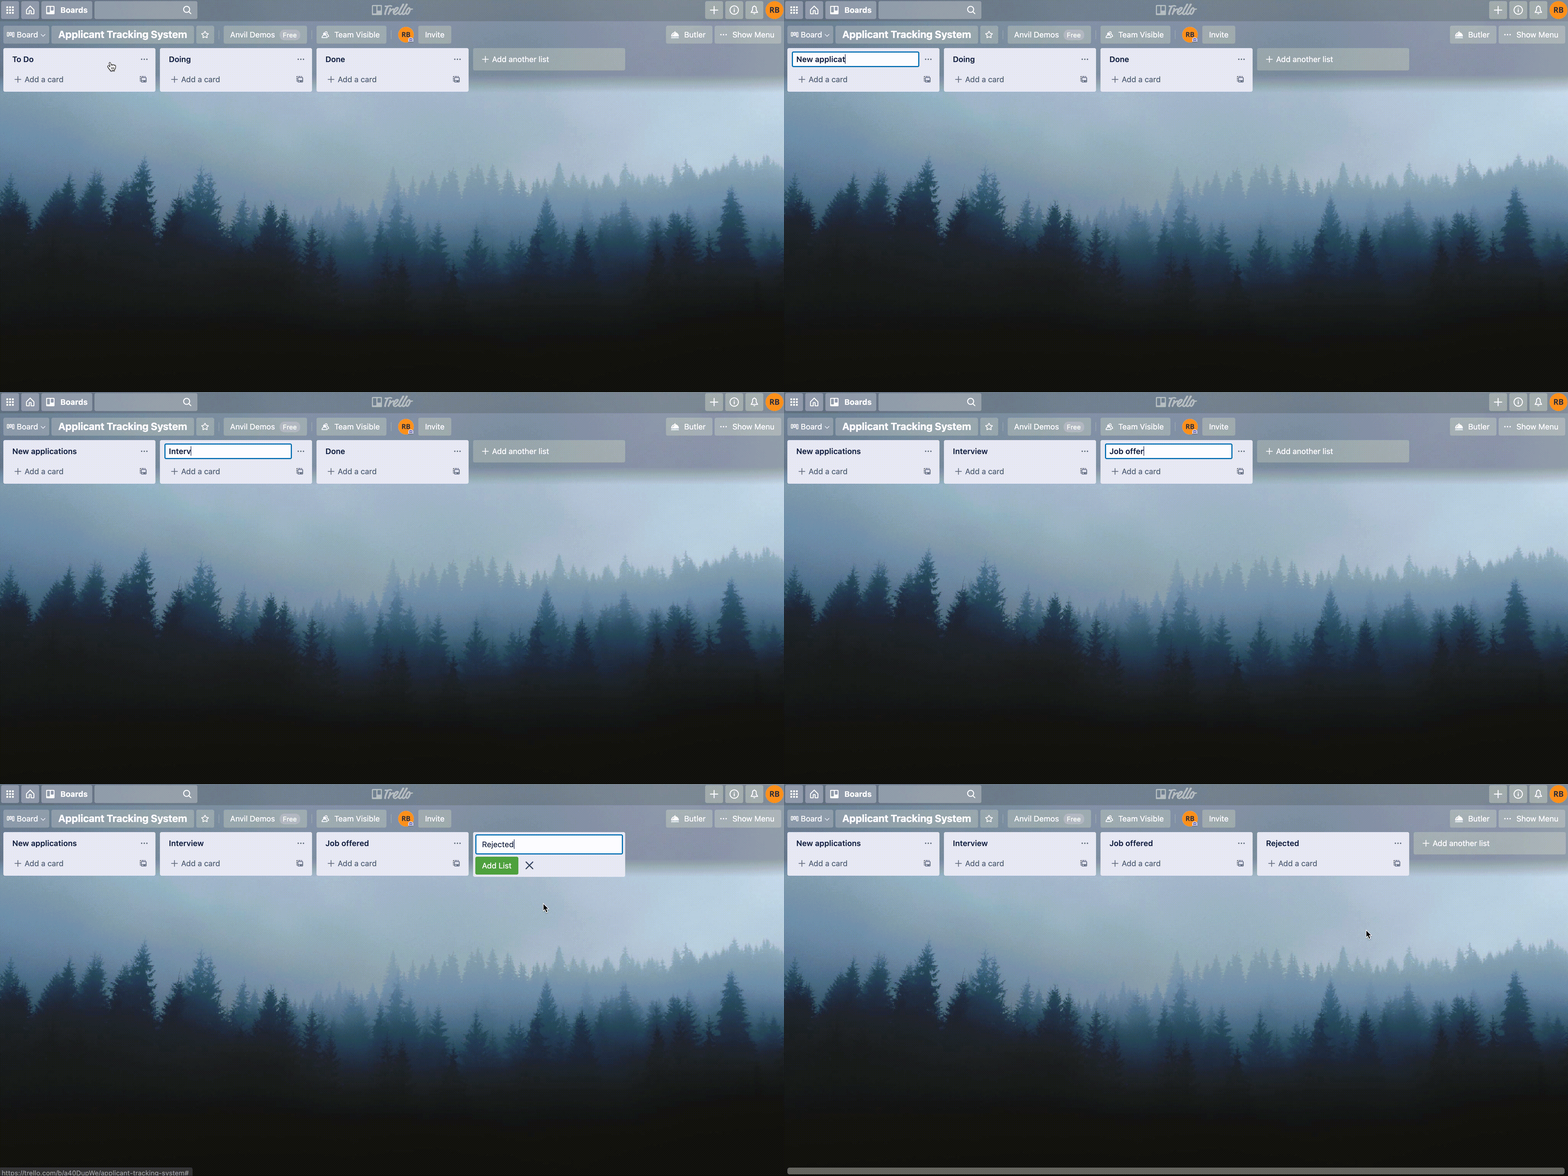
Next, we’ll create a list for each step in our recruitment process: New applications, Interview, Job offered and Rejected.

Creating Trello lists for each stage in our recruitment process
That’s it, we now have a Trello board our app can send data to.
Step 2: Add a custom field to the Trello board
Trello Power-Ups are a great way to increase the productivity of a board. We are going to use custom fields to make the email of each applicant highly visible and easy to return via Trello’s API.
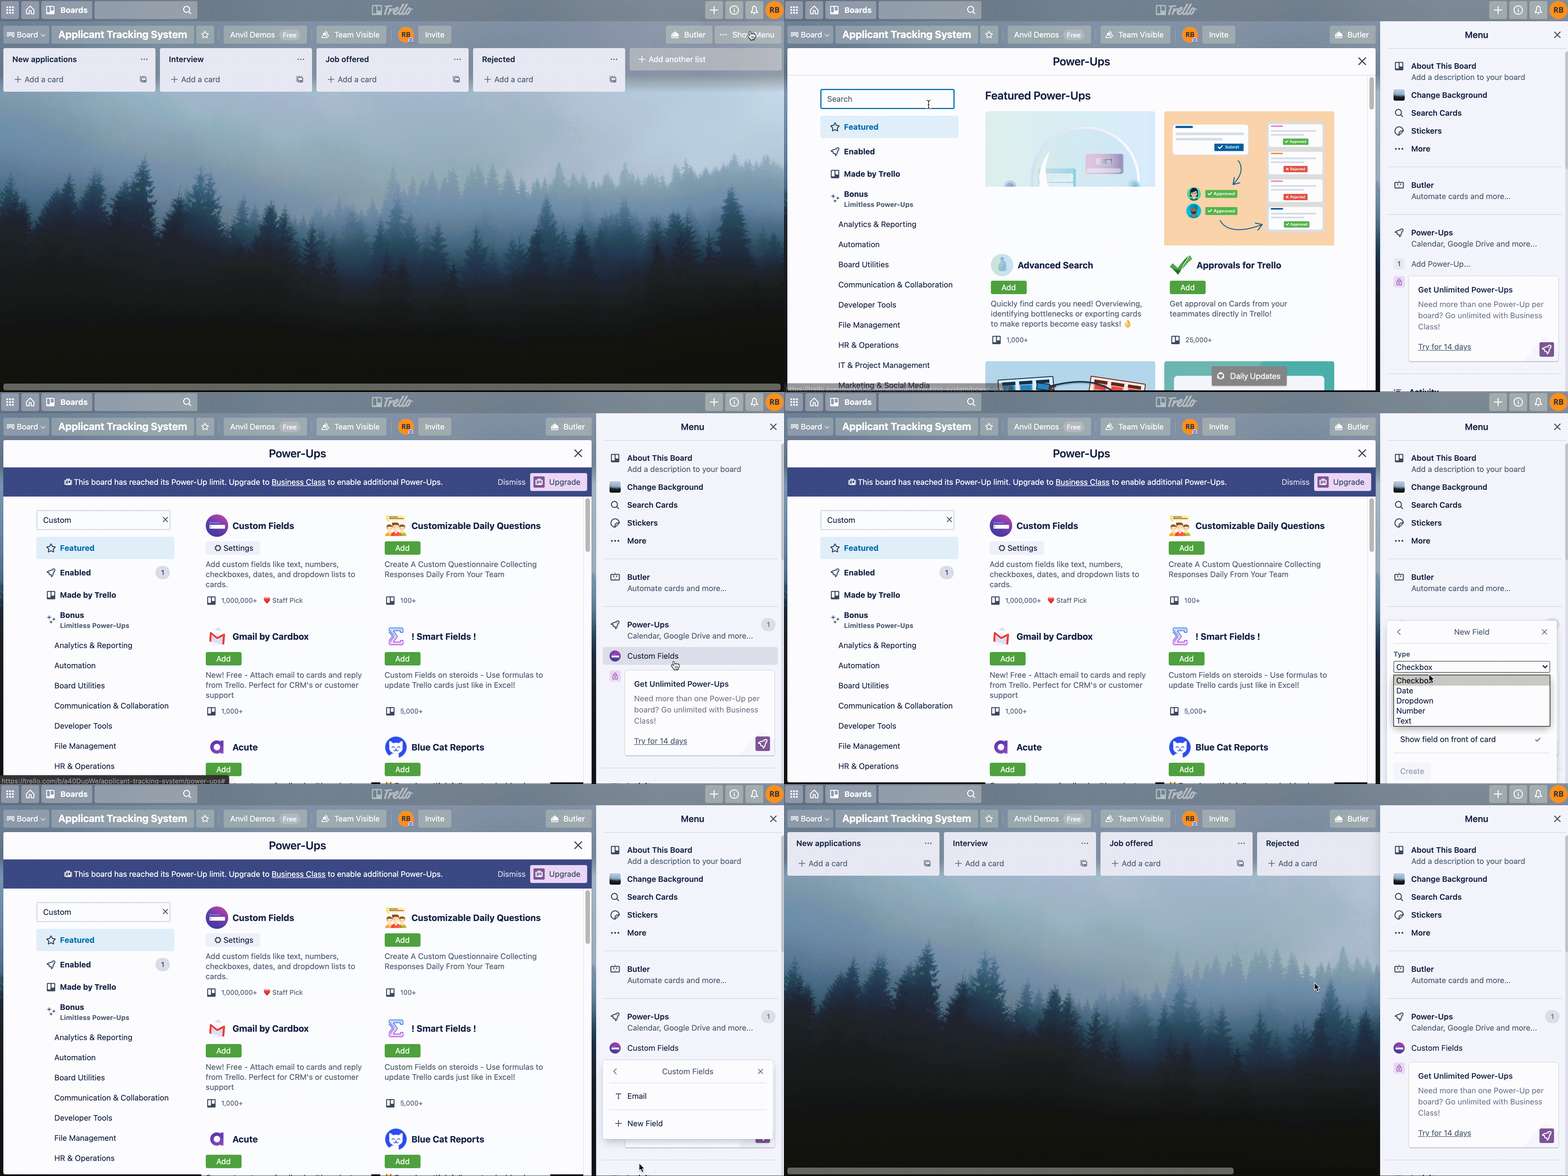
To add the custom fields power up, while viewing our board go to Show Menu and select Power-Ups. Then we will search for Custom Fields and add the Power-Up.
The Custom Fields power up will appear in the menu on the right of our screen, click on it and select the Edit Power-Up Settings option. Click on + New Field and create a field setting the type to Text and name to Email.

Adding the custom fields power up
That’s it, we now have a Trello board ready to use alongside our Anvil app. Next up, let’s get our Trello account’s API credentials that we need to authenticate our API calls.
In Chapter 3, we’ll begin sending the details of your job applications to your Trello board using the Trello API.
 By
By